
A Comprehensive Guide to using a GoPro for Travel Photography
Last month I bought a secondhand GoPro Hero4 Black and since then I haven’t left the house without it! It is now my go-to camera for photos and video. I plan on using quite a bit on my trip this year to Australia and Southeast Asia. Here’s a guide that I put together as I was learning to use my GoPro for travel photography. I’ve added plenty of example photos (both edited and unedited), and will update with new photos from my GoPro travel!
Updated: January 2017 from my travels in Australia.
Disclaimer: I am by no means a photographer. I’m a scientist. I work with numbers and stuff. But for me, the process of learning how to take photos is the same as the trial and error process in research. Here’s the information that I’ve gathered and some of my observations and suggestions for others who are learning to use a GoPro to take travel photos. I’ve linked to other resources where necessary so you can look them up as you go!
Sections in this Guide
Brief reasons to use a GoPro for travel photography
MUST DO
Highly recommended
Gear suggestions
General tips on learning to use your GoPro
Other resources
Last bits of advice

Admiral’s Arch on Kangaroo Island, Australia (edited, with fisheye)
Brief reasons to use a GoPro for travel photography
Each person will have their own reasons, but here are the reasons I chose the GoPro for travel photography.
- Affordability – For a few hundred dollars, I have a high quality camera. Instead of spending 3 times that amount, I chose the GoPro to get more bang for my buck.
- Durability – I wanted something that I didn’t have to baby while on the road. While I do treat my electronics very well, I don’t want the added stress of having to take care of expensive equipment (not to mention the anxiety of carrying around something so valuable).
- Size – I like having a small camera that I can hold in my hand…and I have pretty small hands. I’ve become more of a minimalist in the past few years, and this fits in nicely.
You can find more Pros and Cons here: Pros and Cons of using the GoPro as your travel camera. Some the main reasons for choosing a GoPro vs a DSLR or GoPro vs point and shoot camera lays in the convenience and durability of GoPros. Their strengths are high quality coupled with compactness.
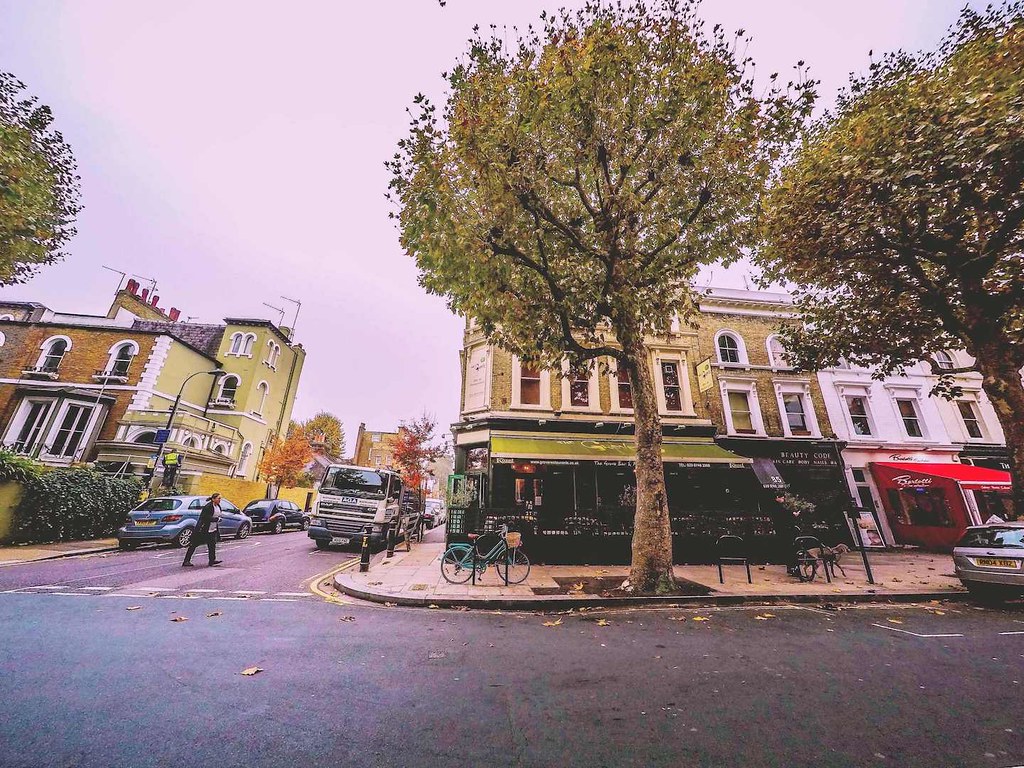
The Grove pub in London (edited)
MUST DO
These are all tips that are highly recommended by myself and others who shoot photos with GoPros.
Steady hand
Try different ways of holding the GoPro and figure out what is the most stable way for you. Generally, holding the GoPro closer to your body will be more stable than extending your arms. Experiment with steadying it against objects, such as a railing, or body parts (forehead, hip, knee, etc.). You can also get a tripod or other mounting equipment to get a steady shot.
Clean your lens
Make sure your lens is clean by wiping it with a microfiber cloth! Also clean the inside and outside of the GoPro’s housing so you get a smudge-free photo. It can fog up easily if you are in humid or wet environments (see section below on anti-fog inserts).
Time Lapse Mode
Use time lapse mode when you can. You can set it to be the default when the camera turns on. Abe Kislevitz recommends 0.5 to 1 seconds for more action-y things and everyday photos, and 2 or 5 seconds for slower activities like hiking or paddle boarding. The front display will show a countdown and the light will flash when it is taking a photo.
Some people may recommend using the Single Mode as your default. Try both out and see what you like better. With Single Mode, because you will be pushing the button pretty hard to get it to take the photo, keeping steady or using a tripod will be much more important for getting a clear and crisp image. I used it on single mode for the first day. Then I put it on time lapse of 2 seconds for the first few days, and then switched to 0.5 seconds and have kept it there since then.
Get close
The target of your photos will look twice as far if you don’t stand close enough. This is a result of the wide angle lens. So, you should try to stay close to the object so that it will fill the frame. This also goes for using selfie sticks. You don’t need to extend it as much as you would for using a phone to take a photo. In most cases, arm’s length is enough for selfies with the GoPro. If you are trying to get most of your body in the shot, aim for your belly button.
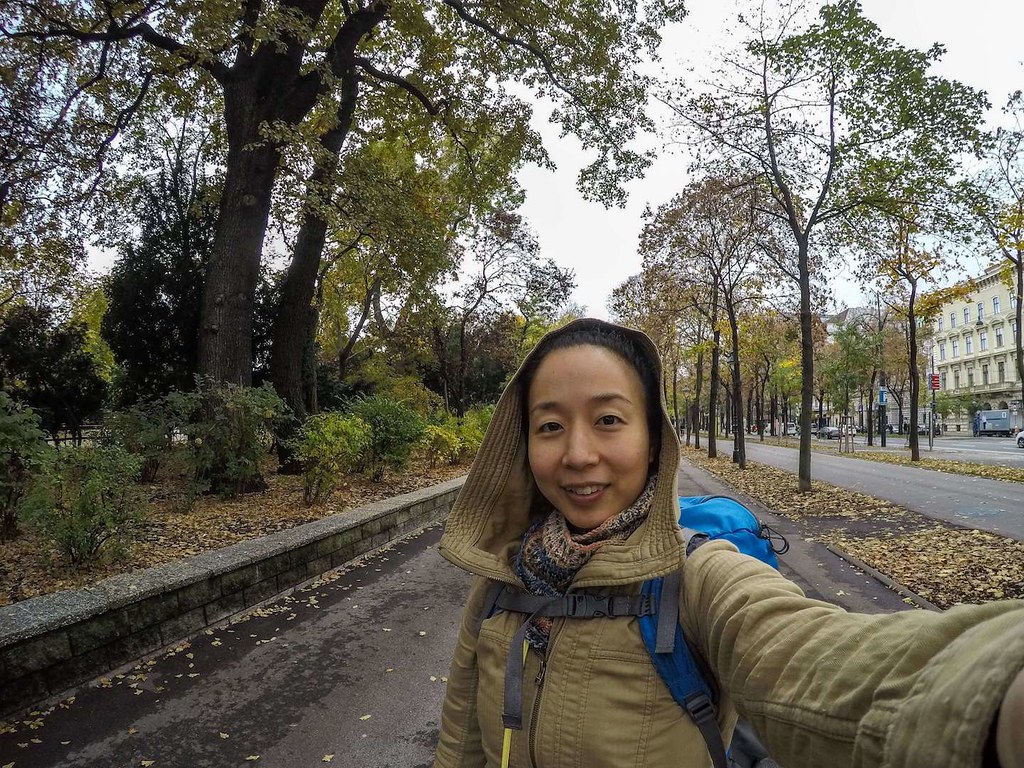
Selfie in Vienna, Austria (edited, with fisheye)
This is an example of being a bit too far away from my subjects:
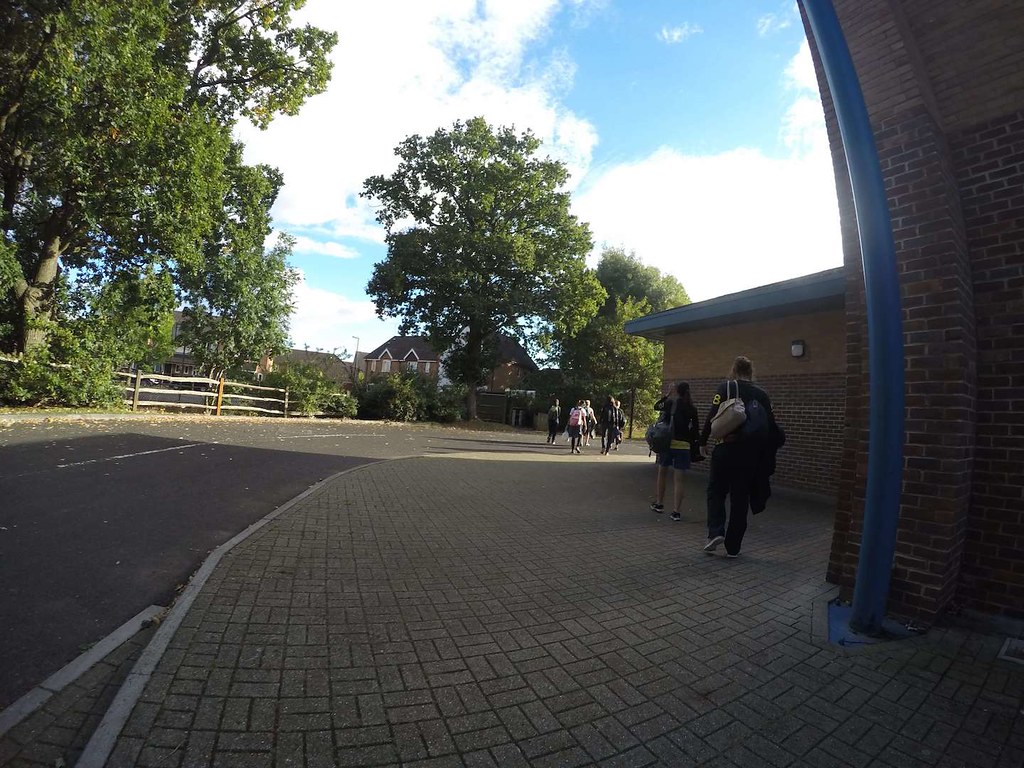
Too far behind…(unedited)
Back up your photos
Make sure you back up your photos to the cloud or to one or more external hard drives. It’s also recommended to clear the photos off of your SD card after you’ve offloaded them to your computer, but some people prefer to leave the copy on the SD card. With external hard drives, it’s recommended that you get a new one every 3 years as they will fail after a certain amount of use. I would also recommend not filling them to more than 3/4 full to ensure proper functioning. Some people travel with 2 external hard drives that they back up to. (I’d also travel with a small waterproof stuff sack for the hard drives and electronics so they don’t get damaged by surprise wetness!)
Highly recommended
Max out MPs
Shoot photos in 12 Megapixels Wide mode. The other modes are derivatives of this setting, meaning the images are just cropped versions of the 12MP Wide. If you want to crop and fix things, you can always do that afterwards.
Use the app or LCD screen
If you have the LCD screen in your model, or if you buy the LCD BacPac screen that attaches, use it to help frame your photo. You can also check the images in the GoPro app for your phone. Once you get used to using the GoPro, you may not need it anymore, but in the beginning it will tighten up that feedback loop so you will learn faster.
Take care of your equipment
- Before taking your first photo, format the SD card from the GoPro settings to be sure that it is ready and there are no compatibility issues.
- With batteries, if you aren’t going to use them for a long time, charge it to 50% and take it out of the GoPro. Storing lithium ion batteries at half charge is best for the health of the battery.
- Wipe your lens and the part of the housing covering the lens with a microfiber cloth.
- To prevent water droplets from forming, lick your housing and let it dry.
- If you aren’t using housing, make sure you have a lens cap to protect the lens from scratches, dust and dirt.
Tip: To keep your gear dry, save a few dissicant packets from packaged food and put them in a dry sack with your GoPro!
Edit your photos
Editing is pretty much a must with GoPro photos, but since it requires more investment of time and resources I’ve put it here in highly recommended. If you can get into it, it makes a HUGE difference! I’ve included both edited and unedited photos in this post so you can get an idea of what to expect.
Chilling at Kangaroo Island Brewery (edited, with fisheye)
It might seem intimidating to open up photo editing software, but you can take baby steps. If you have a Mac, you can adjust the colors in Preview by clicking on Tools in the menu and then Adjust Colors. Play around with Temperature, Highlights and Shadows. If you want to take it to the next level, you can try editing in Flickr (which is free, but not super flexible) or try Adobe Lightroom as a free trial. There are also apps like ProCamera and Snapseed.
I think if you are going to make the investment to buy a GoPro, you should also invest in learning to edit photos and video to make it worth it. Your photos will go from meh to WHOA!
General editing notes:
- GoPro photos’ colors tend to end up cooler, so you’ll most likely need to up it a little in Temperature.
- Bring down Highlights, bump up Shadows
- Increase Clarity, Vibrance and Saturation (But try not to overdo it!)
- If you want to reduce or remove the fisheye effect and you aren’t using the Hero5, you will have to use editing software such as Photoshop or Lightroom.
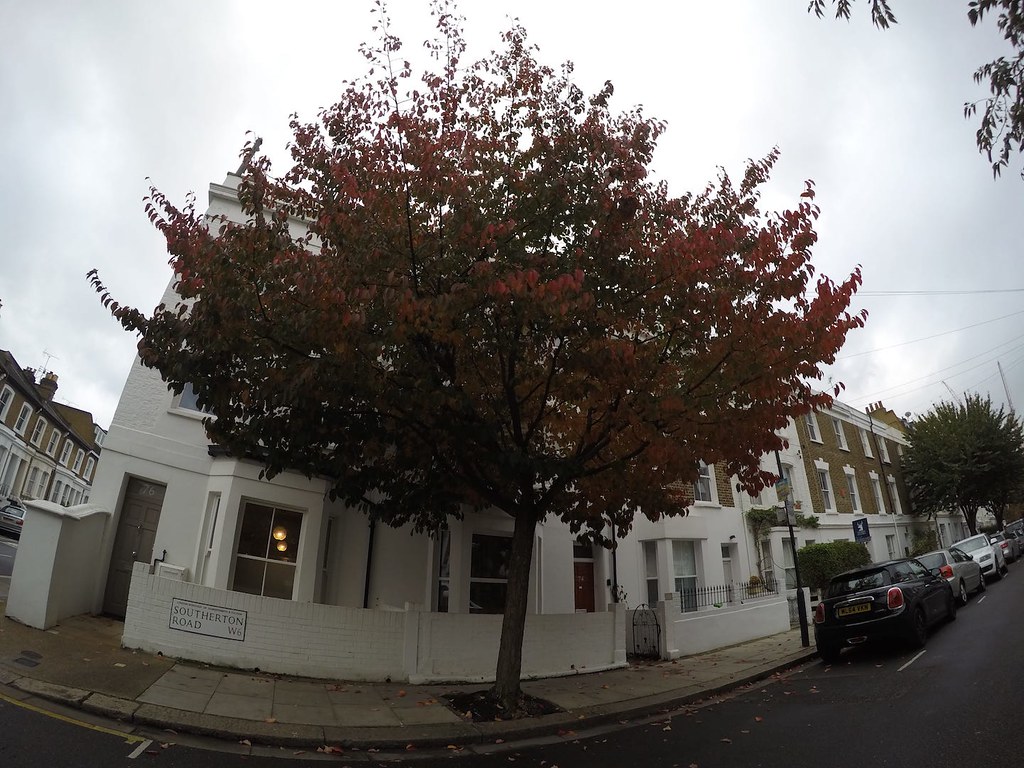
Here are two photos, the second was edited in Lightroom.
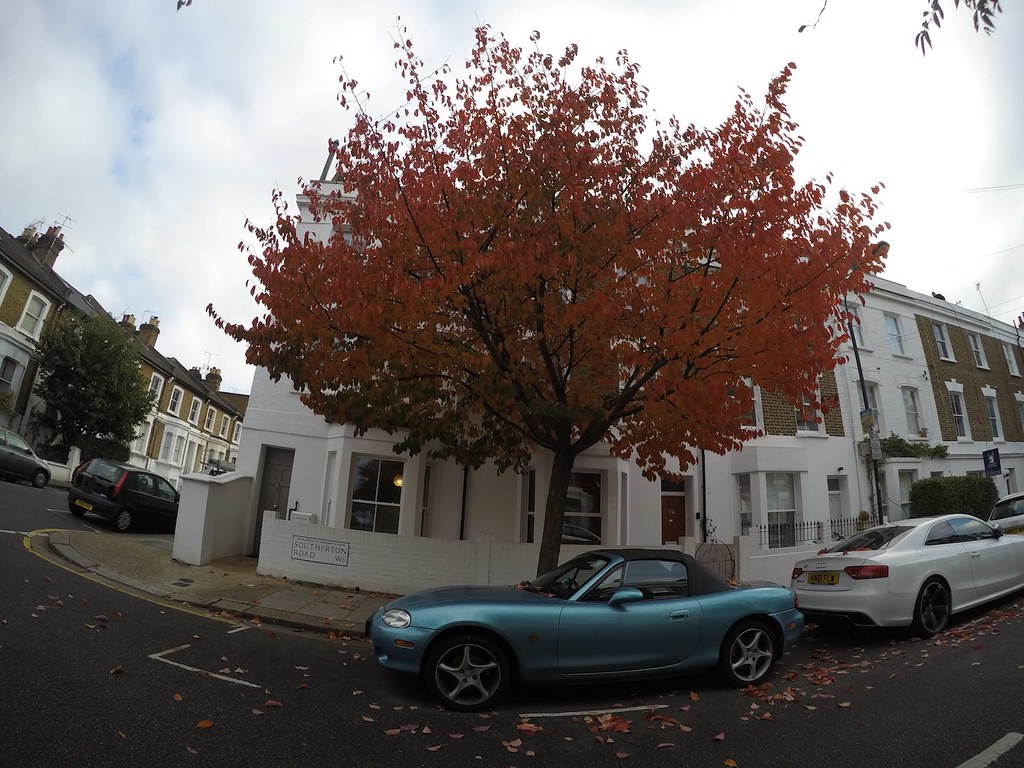
Southerton Tree (unedited)
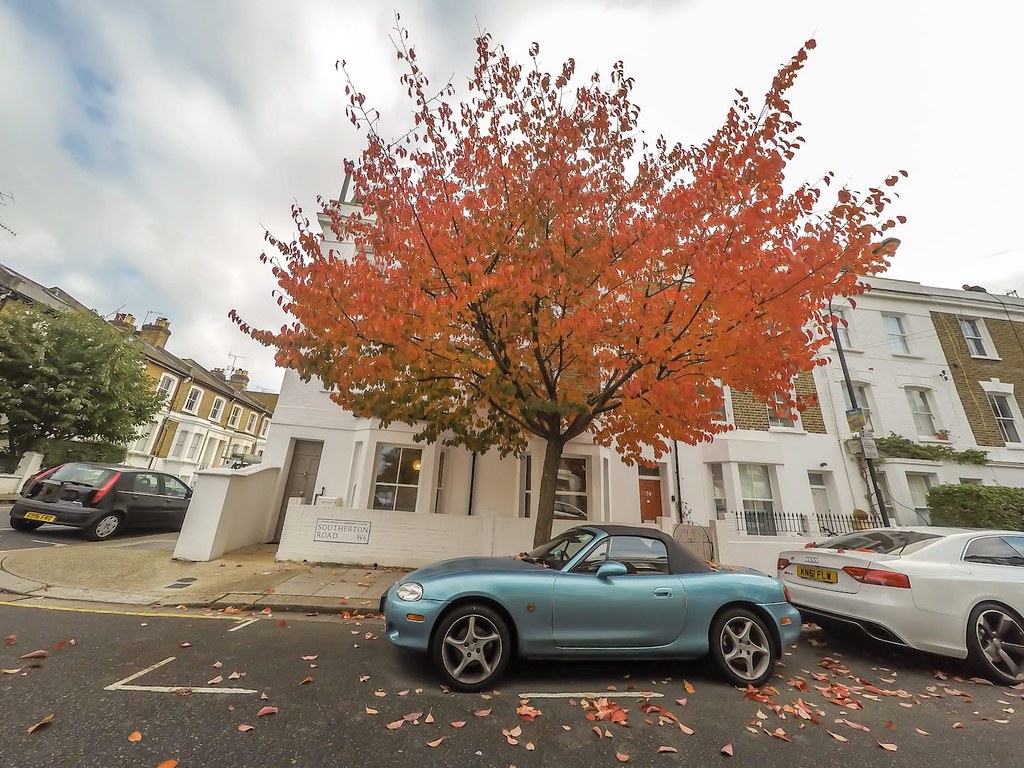
Southerton Tree (edited, without fisheye)
Here’s another set of two photos, the second was edited in Lightroom.
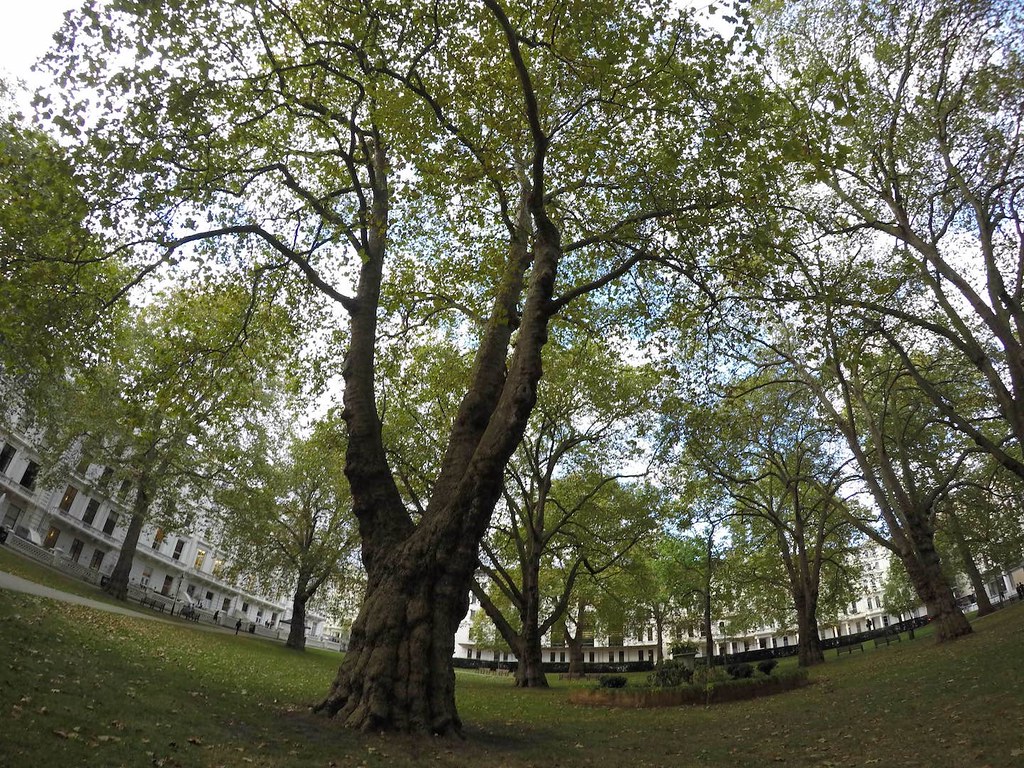
Prince’s Gardens (unedited)
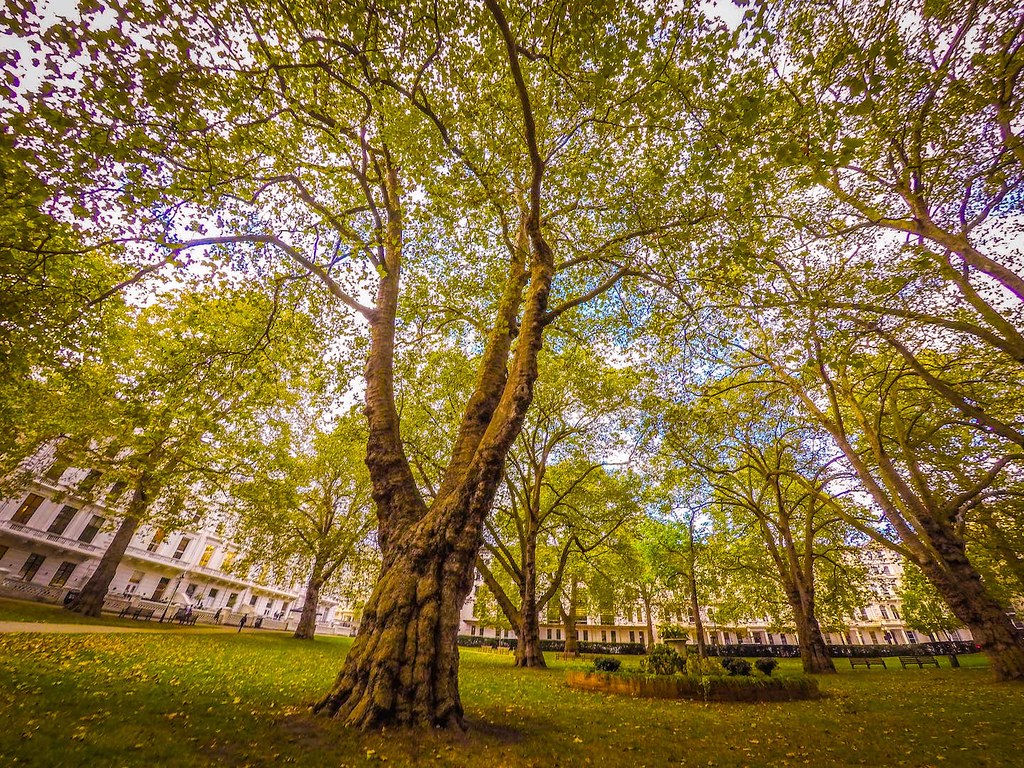
Prince’s Gardens (edited, without fisheye)
Here is an article with great tips for editing in Lightroom. There are video tutorials on YouTube for using Lightroom that I found super helpful such as this one:
And this one:
GoPro travel gear suggestions
The whole shebang?
You may not need all the accessories that are available for GoPros. Take some time before your big trip to use it in ways that you will on your trip. If a piece of equipment seems like it will make things infinitely easier, get it and take it for a test drive. Add things as they seem necessary and you’ll eventually have all your GoPro travel essentials.
Spare power bank and/or battery pack
It may be handier to have a spare power bank rather than a spare battery. You don’t have to swap the batteries and instead can plug the GoPro directly to the power bank and keep going.
Floaty handle or backdoor
If you are going to use the GoPro in water, you might want to get a floaty handle or backdoor so that when you inevitably let go of the camera it won’t sink to the bottom.
Filters
There are many types of filters for the GoPro (see table below). If you want to film while diving, you will need to invest in filters, depending on the type of water and the depth you will be going.

Anti-fog inserts (or uncooked rice)
If you’ll be in humid conditions, it’s a good idea to have something inside your case/housing to absorb any moisture that gets in. You can use a piece of paper, or uncooked grain of rice, or buy purpose made anti-fog strips that can be reused.
Tip: If you buy the anti-fog inserts that are resusable, the instructions may say to put it in the oven for 5 minutes, but you can just throw them in the microwave for 5-15 seconds! Super quick and easy, and less risk of burning! Be careful when you take them out though, they may be hot (and don’t put them straight back into the housing).
My GoPro travel gear
I bought a Gekkopod, filters for diving and anti fog inserts, but also invested in the following items. I’m debating if I want a floaty backdoor or handle. I think I will wait on it for now. I’m thinking about getting a macro filter, but may wait to maybe get one secondhand. A power bank from Anker rounds out my list of gear.

Backpack clip
This mount clips onto your backpack straps or waist strap. You can rotate the GoPro 360 degrees. I recently clipped this to the back of a chair at a conference to take video of someone’s presentation. It’s also a pretty good hand hold if you don’t have a a selfie stick or other handle. It may not be best for recording video or photos while walking, but you can clip it to your backpack strap and either stop and unclip it to use it, or stop and take photos and videos while you are standing still. You can also clip to cargo pockets if you have those.
Steel wire tether
I tend to feel uncomfortable with things hanging off my wrists, so I think this is a brilliant alternative to a wrist strap. I use this in conjunction with the backpack clip for extra security (for both drops and anti-theft). You can loop it around things such as your bicycle’s handlebar in case it comes loose. I leave a carabiner on my chest strap on my backpack and clip in the other loop.
Recommendations by others
These people have written up their accessory reviews or recommendations:
GoPro housing types and best uses for them – This is a really great article about all the types of housing (aka cases) for the GoPro and what the best uses are for them.
Review of GoPro Accessories on Expert Vagabond
Travel Photos with a GoPro
Tips and Review
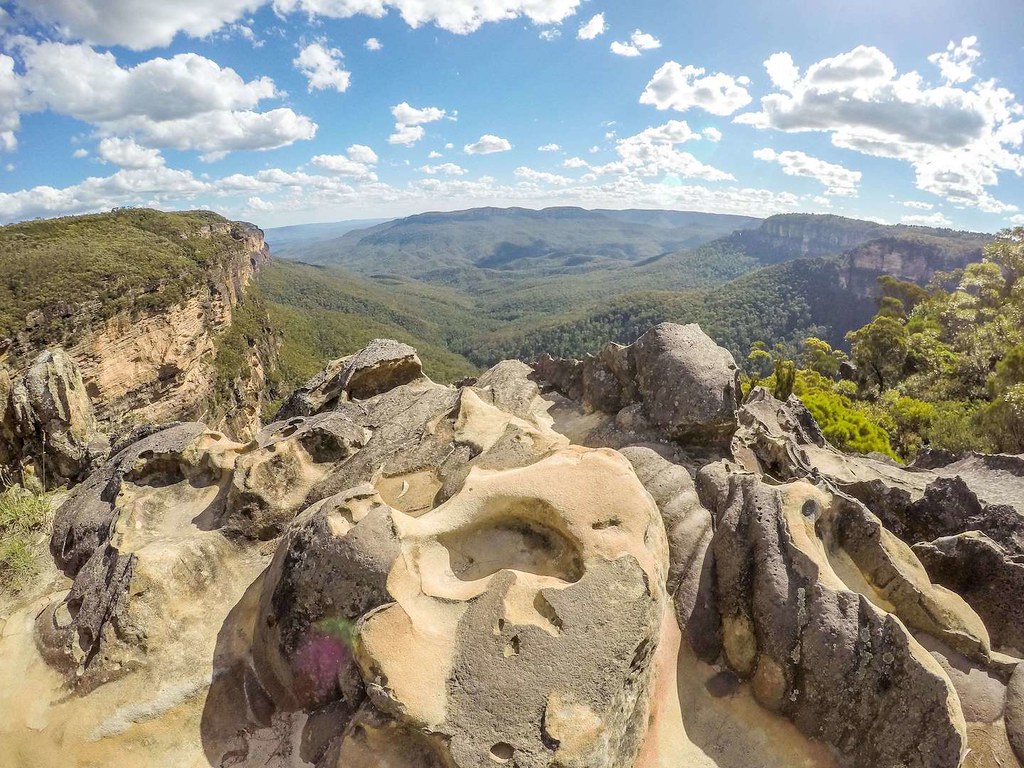
Wentworth Falls in Blue Mountains region, near Sydney, Australia (edited, with fisheye)
General tips on learning to use your GoPro
Shoot er’day
When I first got my GoPro, I made it a point to shoot photos every day for at least the first week, and then actually look at those photos at the end of each day. This way, you learn what worked and didn’t and have immediate feedback for how to improve the next day. If you are shooting things during your morning or evening commute, you can come back to the same locations and try the same shot over again and see if you can improve it.
These are two unedited photos I took one day and the next when I first started out with my GoPro. The second time around, I waited longer for better light and I framed the photo much better IMO.
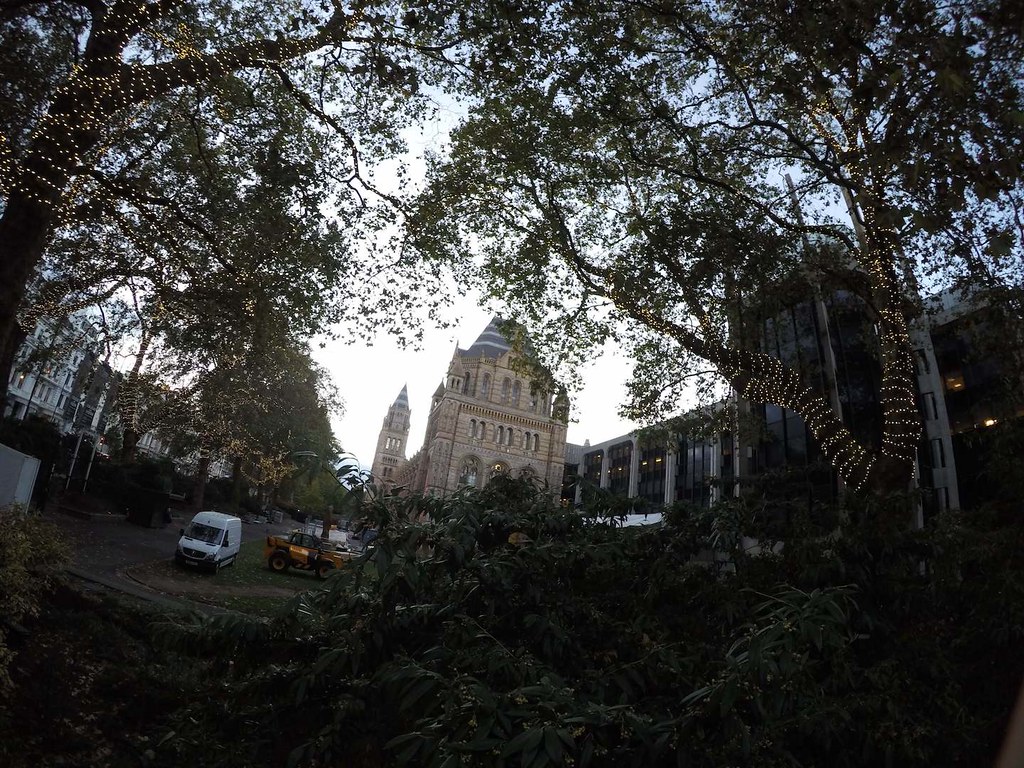
Natural History Museum Day 1 (unedited)
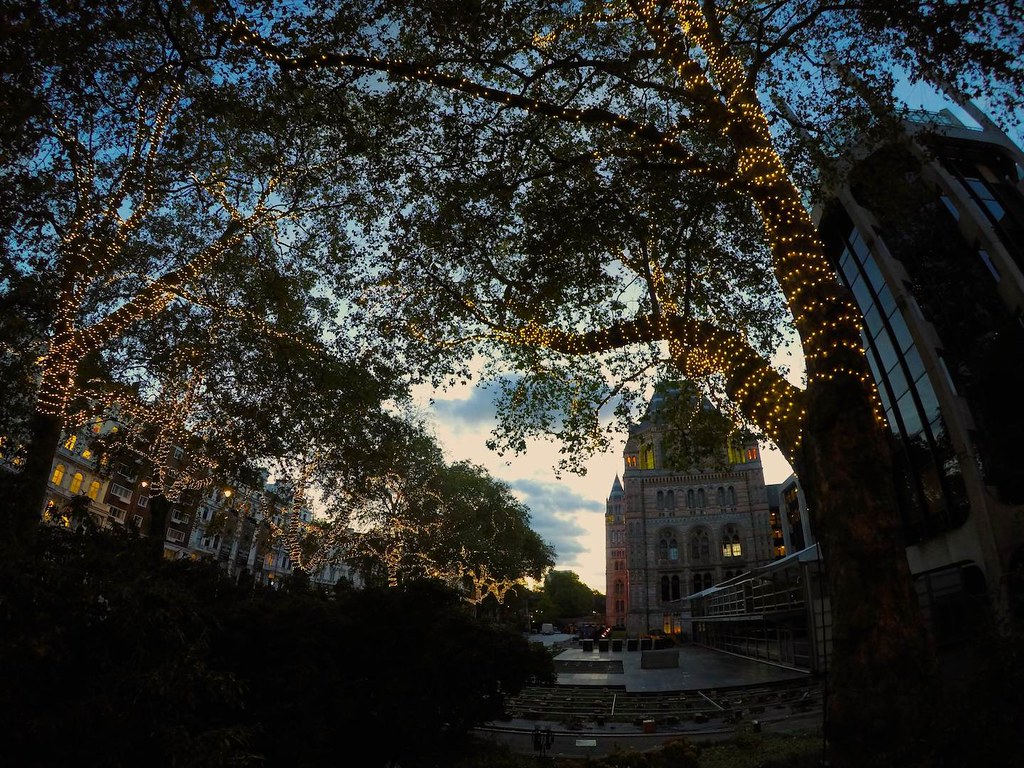
Natural History Museum Day 2 (unedited)
These two were also taken a day apart, but the angle and lighting are better the second time round too.
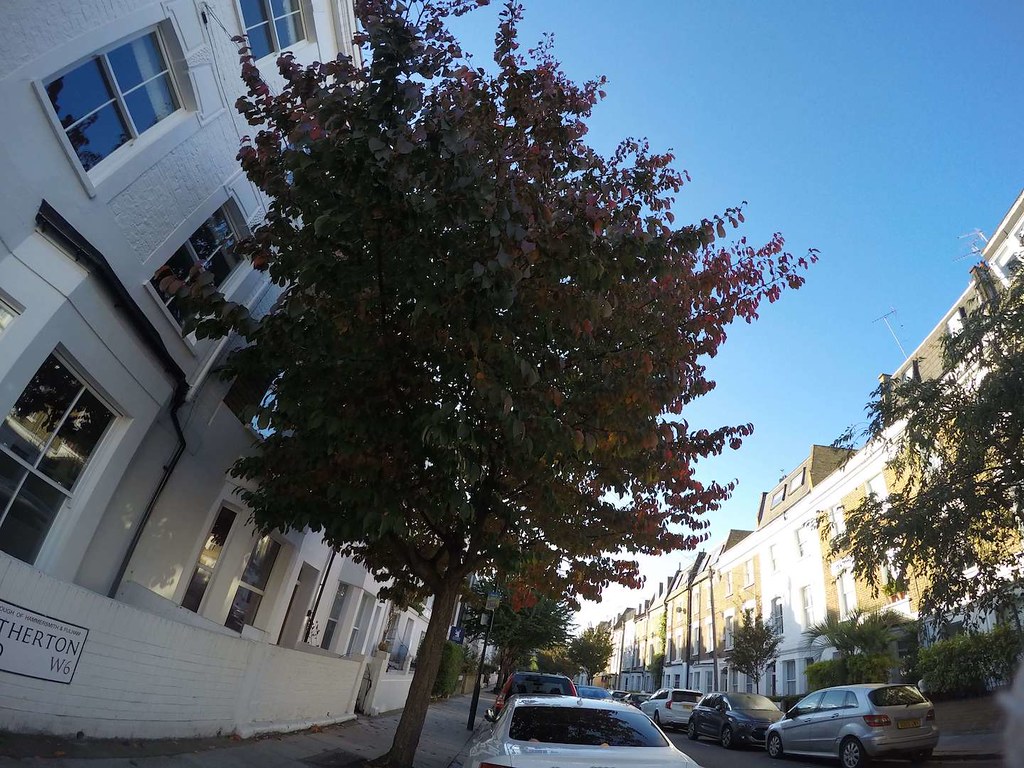
Southernton Tree Day 1 (unedited)
Southernton Tree Day 2 (unedited)
Shoot er’thing
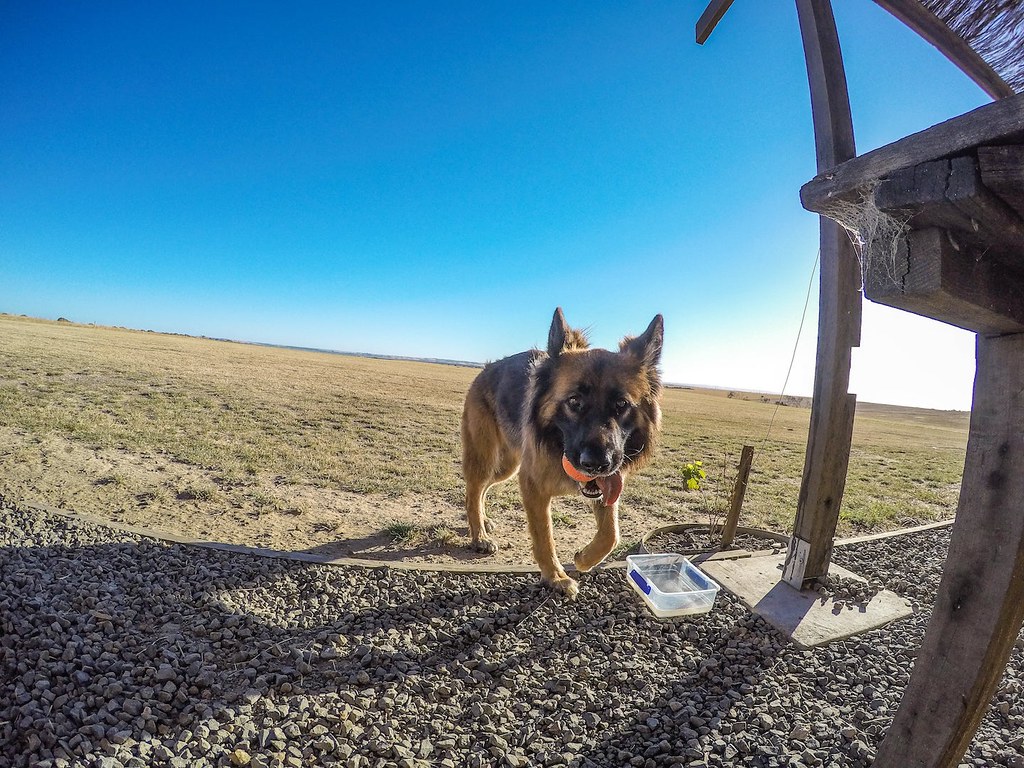
When you are just starting out, don’t think so much about what you are shooting. You don’t have to wait for the perfect scene to get to know your GoPro. Take photos of random things in your room at different angles. That office dog? Try burst mode on him. Test the night mode on your way home from dinner. Get a sense for how things will look and what angles you like.
Shoot er…just shoot
Have fun! This is a learning process, so don’t get too down if your first several tries don’t come out the way you expected. Remember to look at your photos soon after so you remember the conditions and what you did that produced those photos. Take notes if you want to. Put that knowledge to use as soon as possible and you will improve rapidly!
Bare it all
I would also suggest first shooting without a selfie stick or any mount. Carry it in your hands and shoot photos like that for the first few times. There’s this thing called proprioception, which means your perception of relative position of your body parts and strength of effort needed to move. By shooting with the camera in hand, you develop a sense for how it is working relative to your own limbs first. When you move on to mounting it on a monopod or anything else, you’ll learn separately how to use it in that setup but with a foundation of having shot with it in your bare hands first.
Find other GoPro photos for inspiration
Look for the hashtags #BeAHero, #GoPro, or #goproshot on Instagram to see other people’s GoPro photos. People will often also post what settings they used to achieve a certain shot! For GoPro travel video ideas or inspiration, check out their channel on YouTube.
These are some accounts on Instagram posting only GoPro photos:
GoPro
gopro.momentsofficial
thegoprolifestyle
Here are a few of my own that I like (though I’m biased):
Other resources
Understanding Photos in the Hero4 – More details on using the camera
Tips for Better Travel Photos
Top 10 Tips to use a GoPro properly
GoPro Photography Tips
How to Take Kick Ass Travel Photos
How to Improve my Travel Photography
GoPro Tutorial channel on Youtube
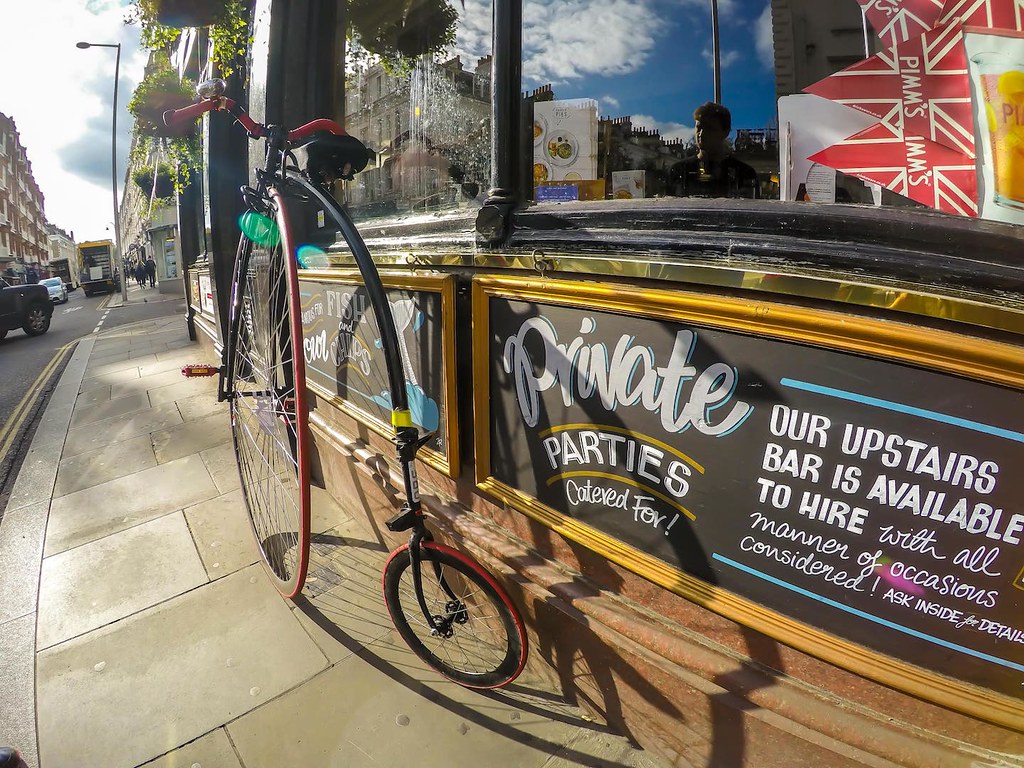
Penny farthing in London (edited, with fisheye)
Last bits of advice on GoPro travel photography
It’s all a learning process! And don’t feel self conscious about whipping out your GoPro! At least you are not taking photos with your iPad…
Joking aside, the GoPro is a fun way to get into photography beyond using a camera phone. Take some time to learn about lighting, composition and editing and it’ll go a long way!
If you are weary about spending a lot of money, look for used Hero3 or Hero4 models on Craigslist or Gumtree or eBay. In the US, you can get the GoPro Hero4 Silver for about 200 USD, and in the UK for about 220 GBP (at the time of writing). Since the Hero5 just came out in October, there might be an influx of Hero3s and 4s entering the secondhand market! Plus, resell value is pretty good as long as you keep it in decent condition. Mine was only 4 months old and had only been on 1 trip to Ibiza when I got it for less than 70% of its retail value!
I hope this was useful for you! If you have any questions, post them in the comments and I’ll get back to you as soon as possible. To find out when there are future updates, photos and more tips, sign up for my newsletter below! As I start to take my GoPro with me to new and exciting places, my photography skills will continue to improve and I’ll have more tips and exciting photos to show you!
GoPro Travel wins
The minimalist in me can’t bear the thought of carrying around a DSLR, so this is a perfect solution in my case. I’m also planning on putting together some of my GoPro travel videos from Australia, so stay tuned!
Do you use a GoPro for travel photography or are you thinking of trying one out?
Pin this for later!


